When working with JSON in IBM DataPower Gateway, it’s important to understand how the platform interprets and transforms JSON data under the hood. In this post, we’ll visually explore how DataPower represents JSON as JSONx, and what it means for your integration flows.
What is JSONx?
JSONx is an XML schema-defined representation of JSON. When a JSON message is received by DataPower service and request type specified as JSON, it gets converted internally into JSONx. This allows you to leverage powerful XML-based tools like XSLT to manipulate JSON data—thanks to its transformation into a structured XML format.
When Does JSON Become JSONx?
In DataPower, if you configure a service to treat incoming data as a JSON on request type, DataPower automatically converts it into JSONx for internal processing. This transformation enables XML-based actions to interact with the content.
However, if you select non-XML as the request type in the service configuration, then DataPower treats the input as raw JSON—not JSONx but still you can access JSONx in __JSONASJSONX context. In this scenario, the message remains in its original JSON form in the INPUT context and can be manipulated using GatewayScript, which works directly with JSON.
Choosing Between JSON and JSONx
When designing a DataPower service, you have a choice:
- To work with JSONx: Set the request type to JSON during the service configuration. This lets you apply XML tools like XSLT or use processing policies that expect XML-like structures.
- To work with raw JSON: Set the request type to non-XML. This keeps the JSON in its original form in the INPUT context, allowing you to manipulate it with GatewayScript or use transform actions that consume JSON.
Let’s explore this in Datapower Gateway visually.
Step 1: Create an XML Firewall
- In the DataPower Control Panel, go to the XML Firewall service section.
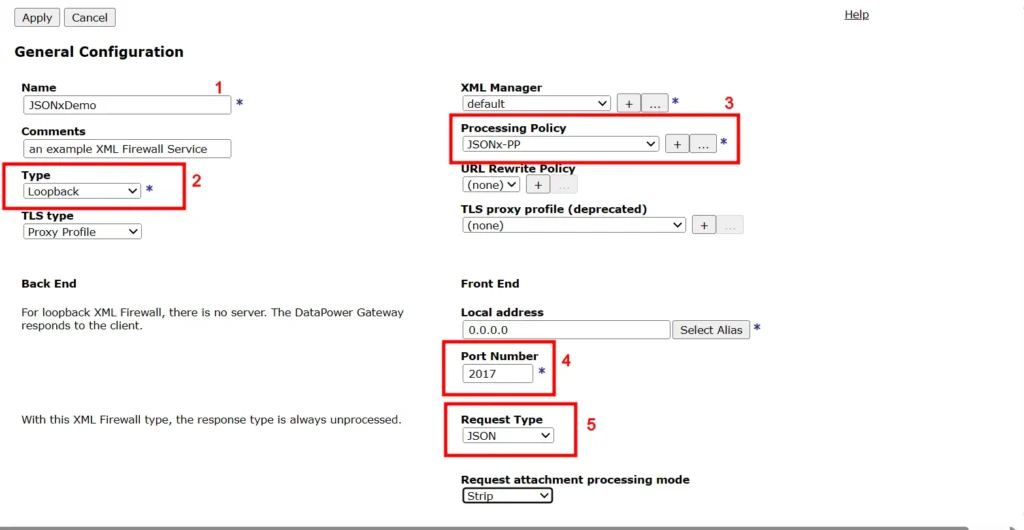
- Click the Add button and provide the following configuration details:
- Name:
JSONxDemo - Type:
Loopback - Processing Policy: Create a new one (see Step 2 below).
- Port Number:
2017 - Request Type:
JSON
- Name:
- Click Apply and then Save Configuration.
Step 2: Create a Processing Policy
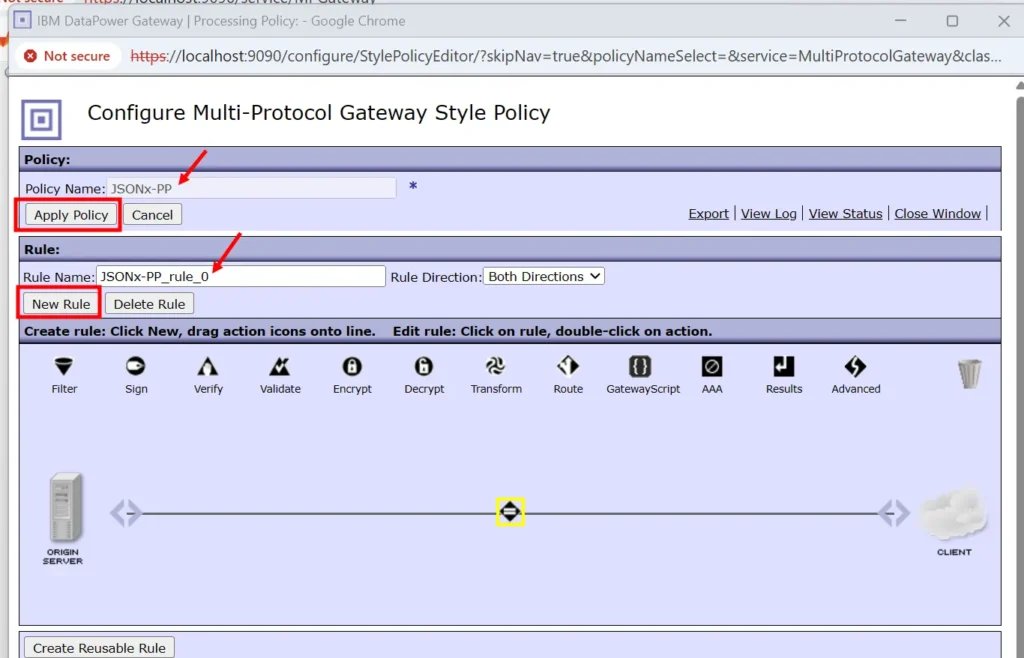
- Click the plus (+) button in XMLFW to create a new processing policy.
- Enter a name for your policy and click Apply Policy.
- Click on New Rule. The Rule Name will auto-populate.
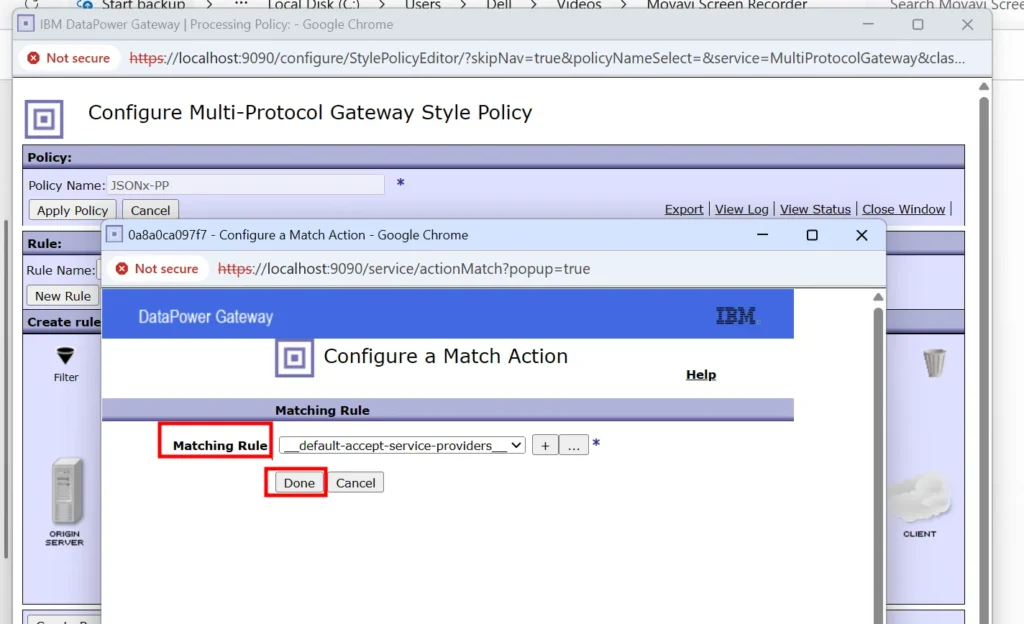
- Double-click the Matching Rule action on assembly line and select a match type (e.g.,
url-allor __default-accept-service-providers__ depending on your DataPower version). Click Done.
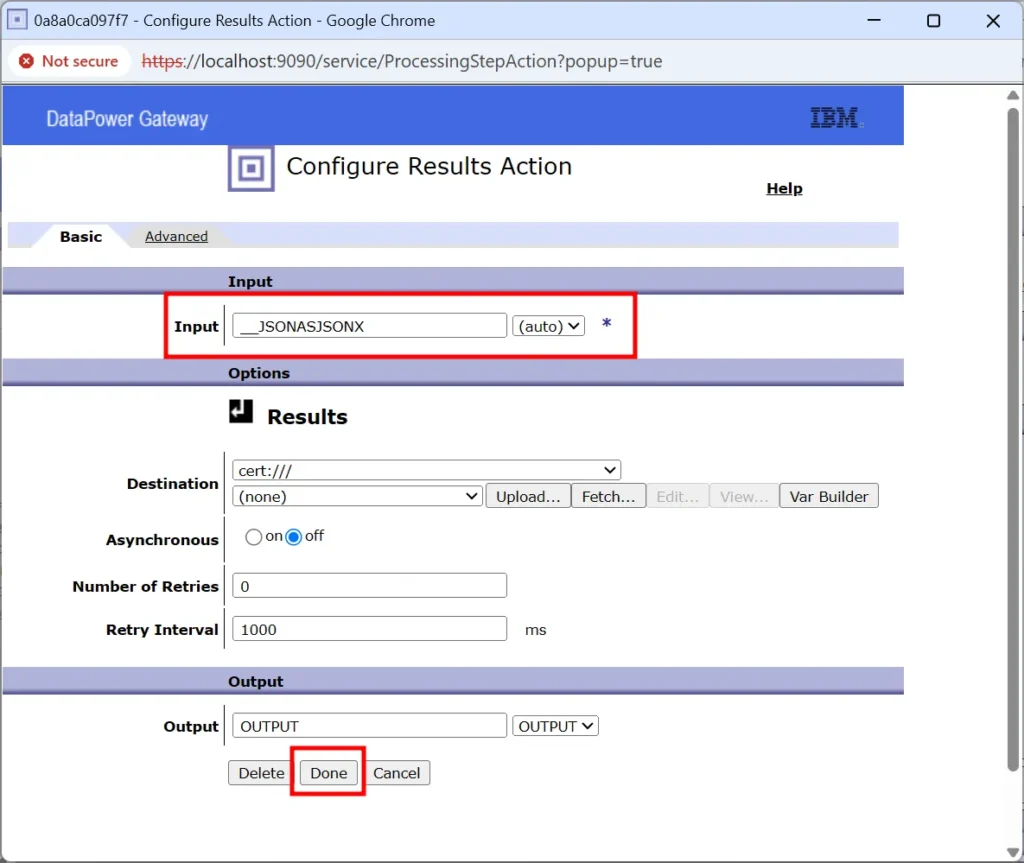
- Drag the Result action onto the assembly line.
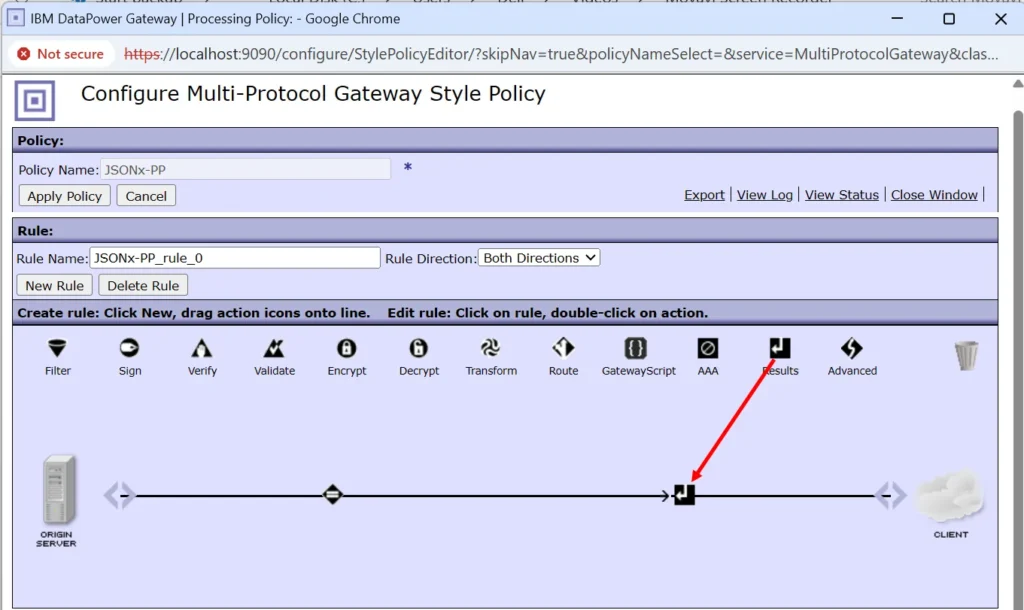
- Double-click the Result action and set the Input to
__JSONASJSONXand click Done.
- Apply Policy, and close the policy window.
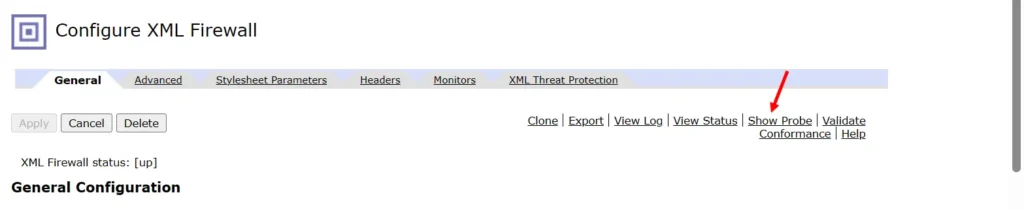
Step 3: View JSONx in DataPower
- Open the JSONxDemo XML Firewall service.
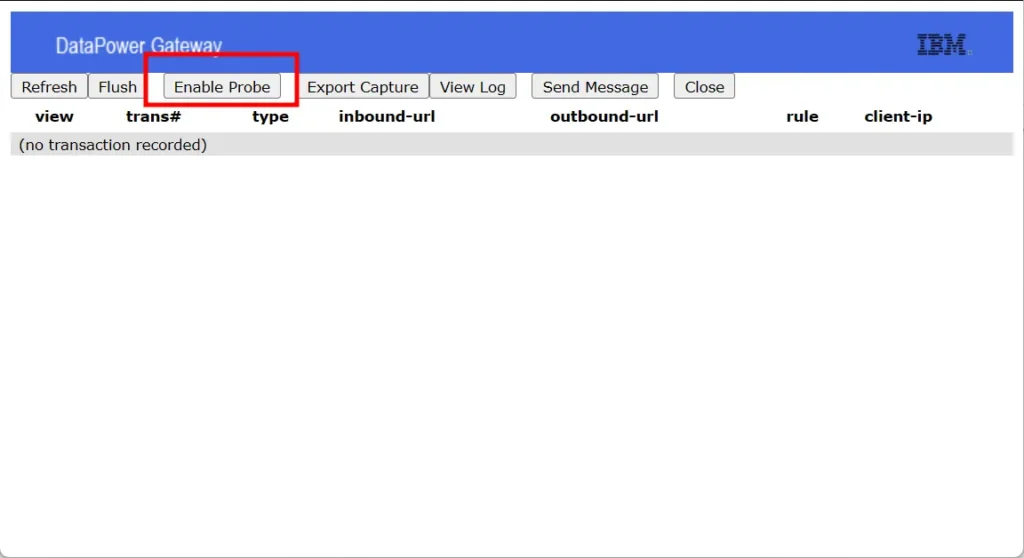
- Click Show Probe.
- Click Enable Probe.
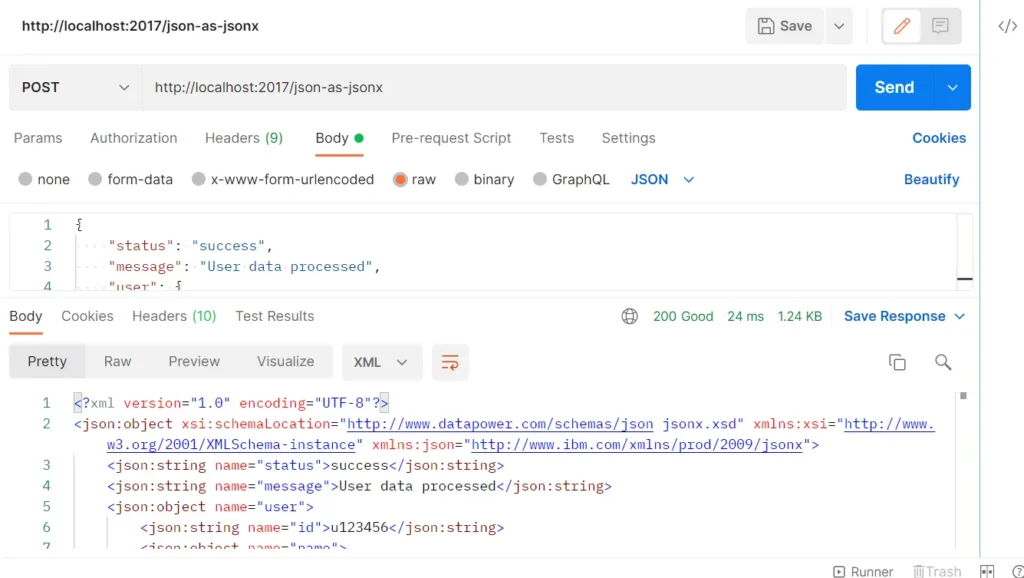
- Use Postman (or any HTTP client) to send a JSON message to your XMLFW service on port
2017.- You’ll receive a response in JSONx format.
{
    "status": "success",
    "message": "User data processed",
    "user": {
        "id": "u123456",
        "name": {
            "first": "Ishfaq",
            "last": "Ahmad"
        },
        "email": "ishfaq@example.com",
        "roles": [
            "admin",
            "editor"
        ]
    },
    "operation": {
        "type": "update",
        "timestamp": "2025-04-09T11:00:00Z"
    }
}
- Go back to the Probe window in DataPower.
- Click Refresh, then click the Search (🔍) icon.
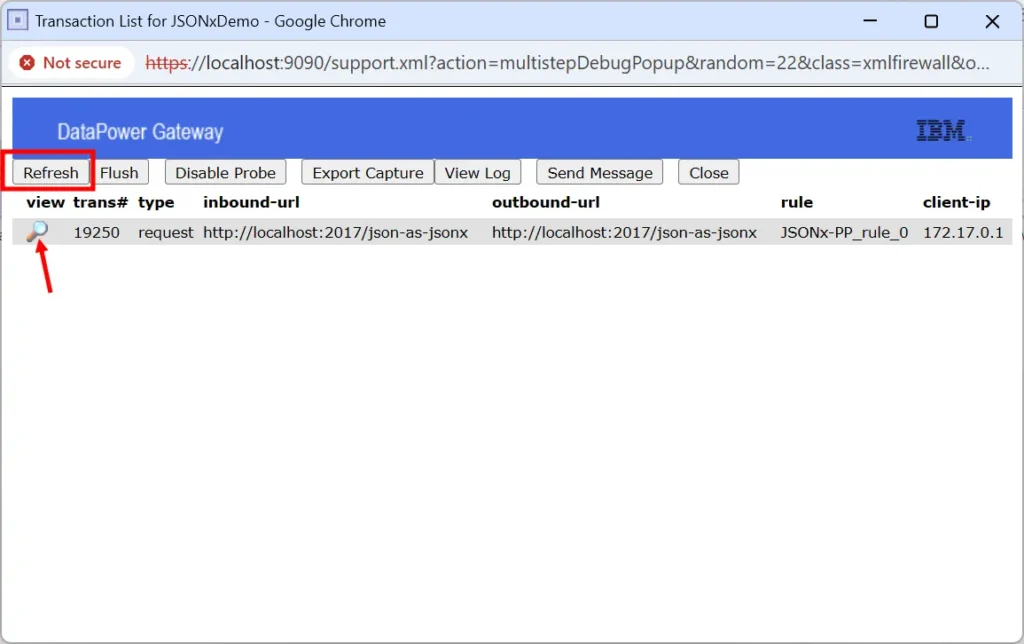
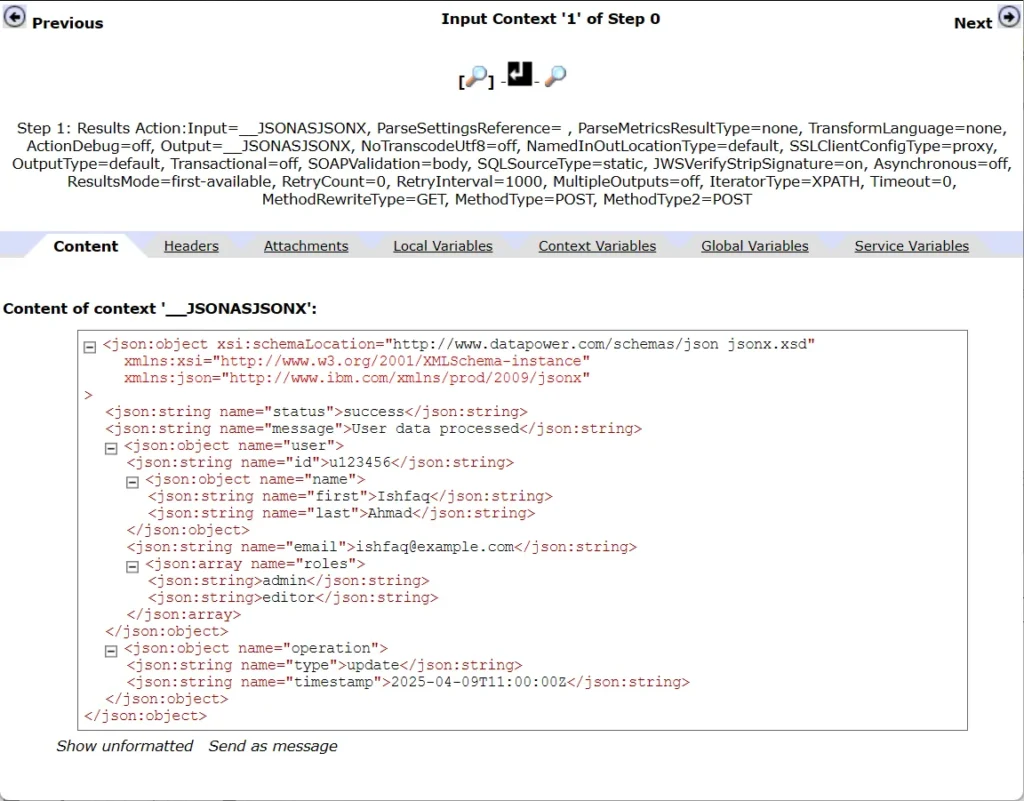
- You will now see the contents of the
__JSONASJSONXcontext displayed in JSONx format.
Summary
By understanding how DataPower handles JSON and when it converts to JSONx, you can make better decisions about how to configure your services and which tools to use for transformation.
Leave a Reply