
In this guide, I’ll walk through how to attach a default Queue Manager to an Integration Node in IBM App Connect Enterprise (ACE). By doing this, we avoid the need to define remote connections when integrating with an MQ Queue Manager.
Prerequisites
To follow along, make sure you have:
- A running IBM ACE Integration Node
- A running MQ Queue Manager with two queues (e.g., Q1, Q2)
Step 1: Attach the Default Queue Manager
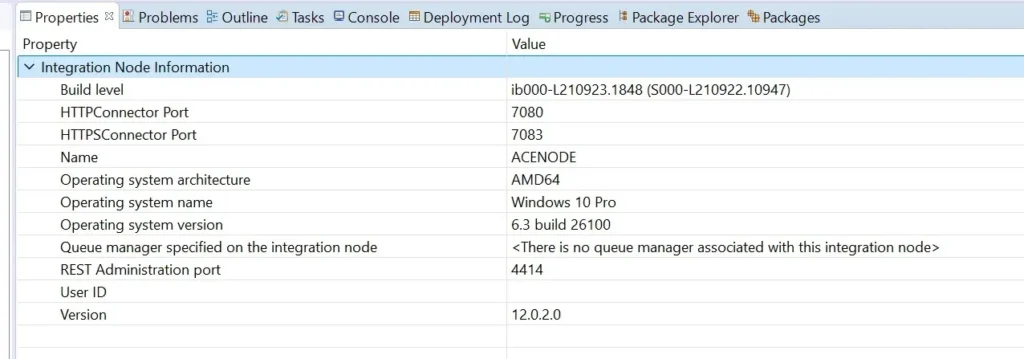
Integration Node properties before attaching queue manager.
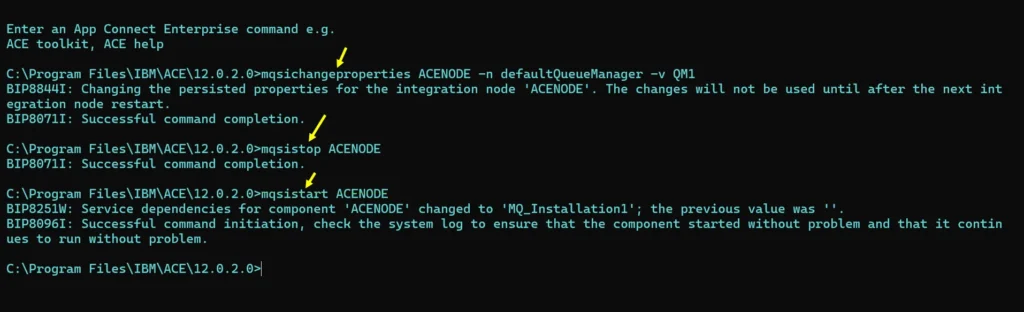
Open the IBM ACE console and run the following commands to attach the Queue Manager (e.g., QM1) to your Integration Node (e.g., ACENODE):
mqsichangeproperties ACENODE -n defaultQueueManager -v QM1
Then restart the Integration Node to apply the changes:
mqsistop ACENODE
mqsistart ACENODE
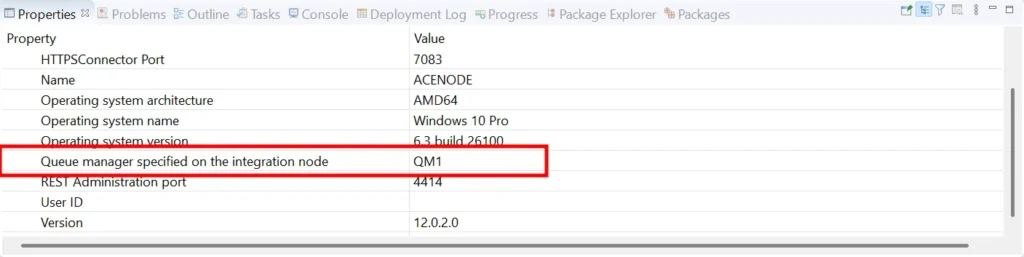
Integration Node properties after attaching queue manager
Step 2: Create and Deploy a Sample Application
Let’s test the setup by creating a simple application.
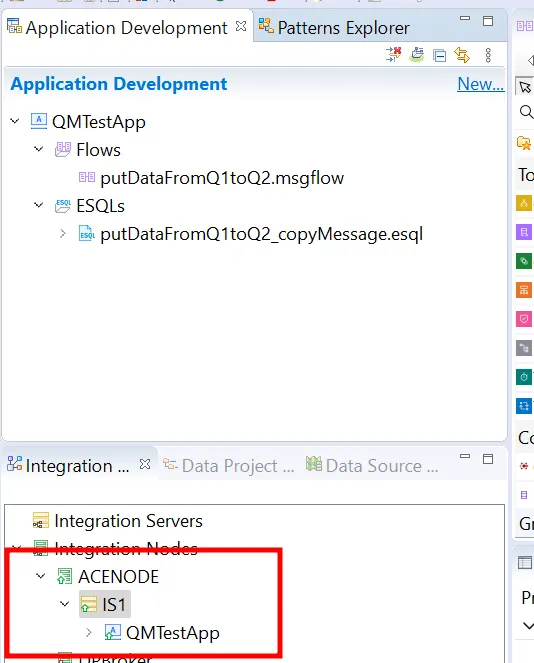
- Application Name:
QMTestApp - Message Flow:
putDataFromQ1toQ1.msgflow
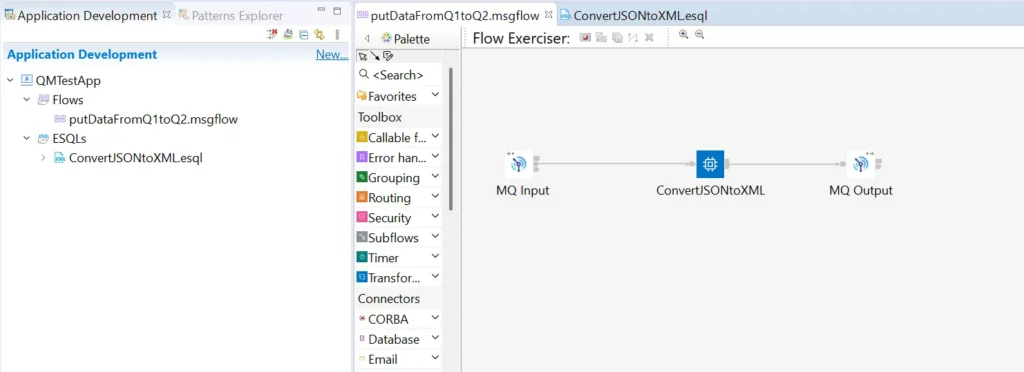
This message flow will:
- Read a JSON message from queue
Q1 - Convert the message to XML
- Output it to queue
Q2
Both Q1 and Q2 should exist on the Queue Manager (QM1) that we attached in Step 1.
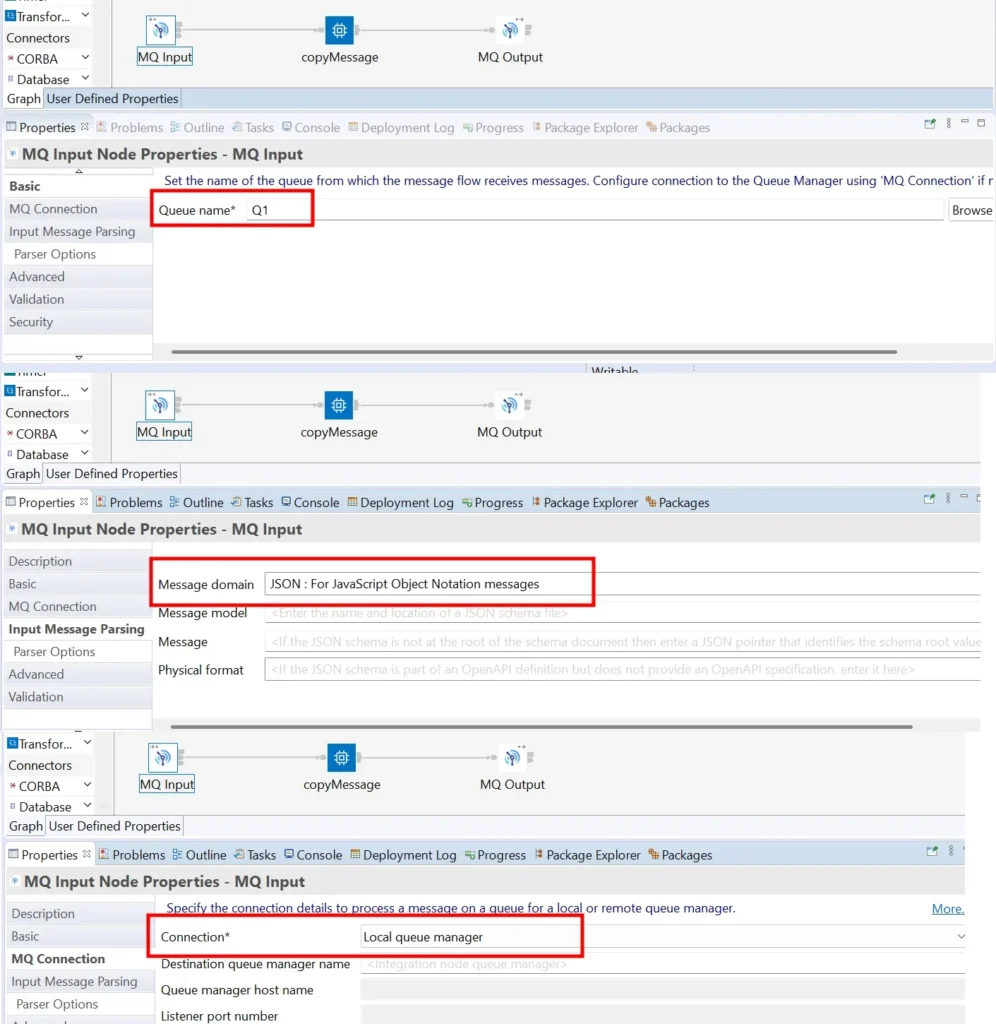
configure MQ Input node as shown below:
- On Basic tab define Queue name as Q1
- On Input Message Format select Message domain as JSON
- On MQ Connection select Connection as Local queue manger.
Double click on Compute Node and paste the following ESQL line of code.
Set OutputRoot.XMLNSC.Body = InputRoot.JSON.Data.Body;
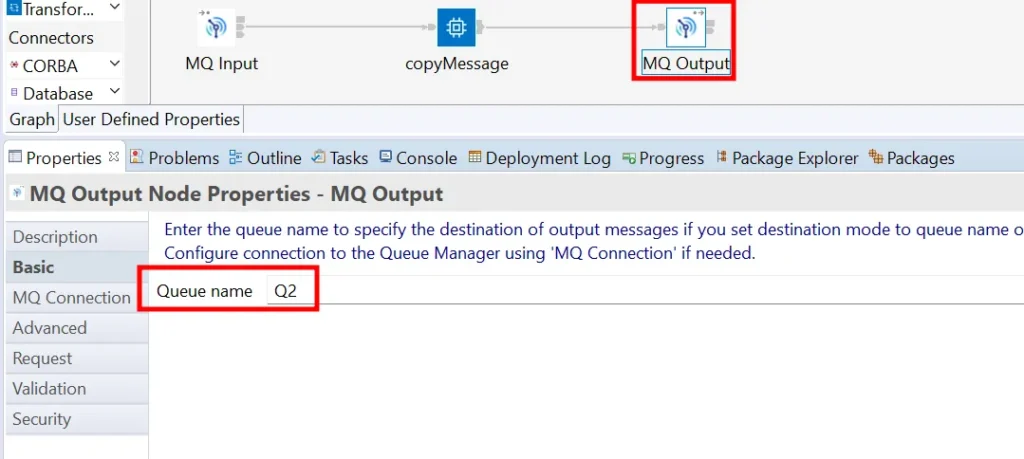
Configure MQ Output as shown below
- On Basic tab define Queue name as Q2
- On MQ Connection select Connection as Local queue manger.
Deploy the Application
Deploy QMTestApp to Integration Server.
Once deployed, you should see an Open Input Count on queue Q1 in MQ Explorer. This indicates that the message flow is actively listening to Q1.

Step 3: Test the Flow Using MQ Explorer
Put a Test JSON Message on Queue Q1
- Right-click on
Q1in MQ Explorer. - Select Put Test Message.
- Paste the following JSON message into the Message Data field:
{
  "Body": {
    "status": "success",
    "message": "Data fetched successfully",
    "data": {
      "user": {
        "id": 101,
        "name": "Jane Doe",
        "email": "jane.doe@example.com"
      }
    }
  }
}
Tip: Ensure the JSON message is on a single line. In Notepad, use: Edit > Blank Operation > Remove Unnecessary Blanks and EOL
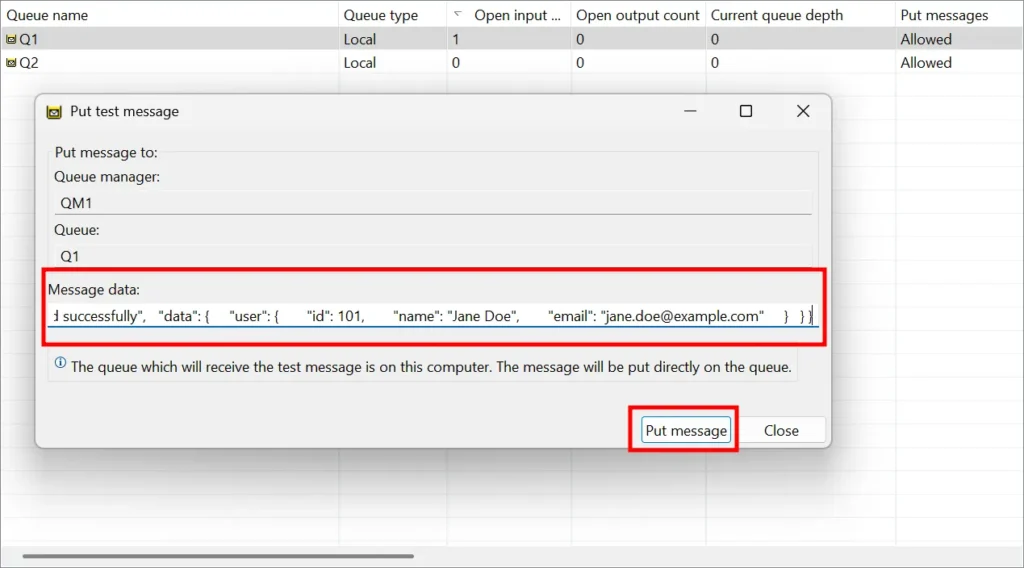
Click Put Message to send it. Once message is sent the message flow will process this and place the converted message on Q2.
Browse the Output Message on Queue Q2
- Right-click on
Q2. - Select Browse Messages.
- Double-click the message, go to the Data tab, and view the converted XML in the Message Data field.

Conclusion
You’ve successfully attached a default Queue Manager to an Integration Node in IBM ACE and verified the flow using MQ queues. This approach simplifies MQ connectivity and eliminates the need for remote definitions in your flows.
Leave a Reply