
Introduction
ODBC (Open Database Connectivity) is a standardized programming interface that enables applications to interact with various database management systems (DBMS). This powerful tool provides a common set of functions for applications to connect to, query, and manage data across different database systems, regardless of the specific DBMS being used. In this guide, I’ll demonstrate how to create MySQL’s ODBC Data Source Name and then integrate that DSN with IBM ACE.
Step 1: Install MySQL ODBC Driver
Begin by installing the MySQL ODBC Driver. You can download it directly from the official MySQL website.
Step 2: Configure ODBC Data Source Name
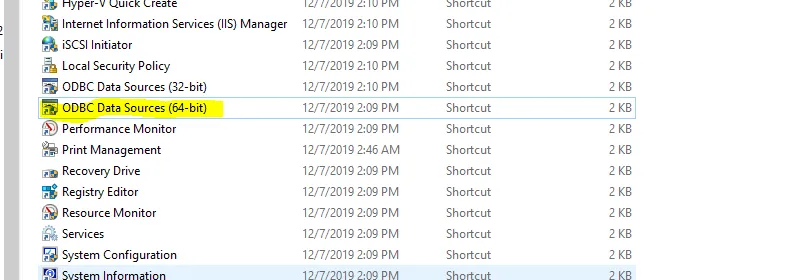
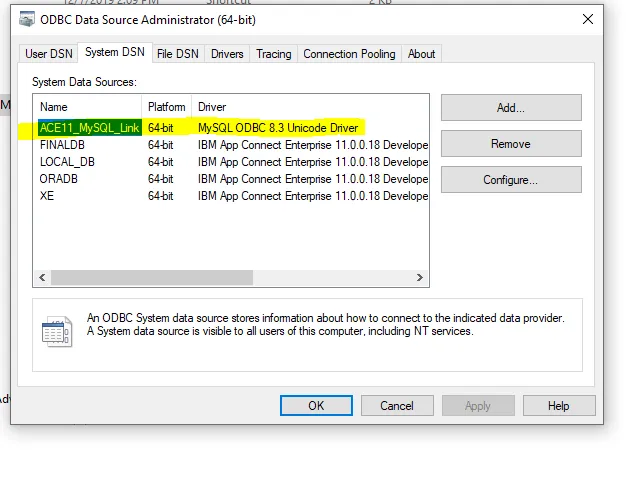
- Open ODBC Data Sources by navigating to:
- Windows Control Panel > Administrative Tools > ODBC Data Sources 64-bit
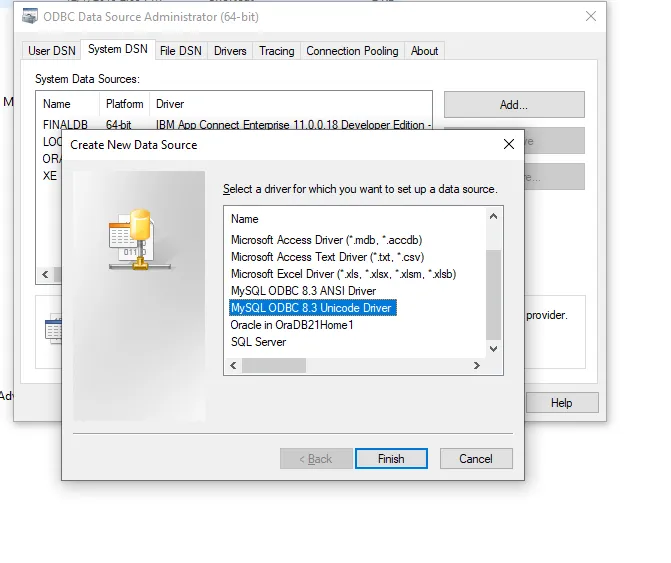
- In the System DSN tab (System DSNs are available to all users), click “Add” and select the “MySQL ODBC 8.3 Unicode Driver”, then click “Finish”.
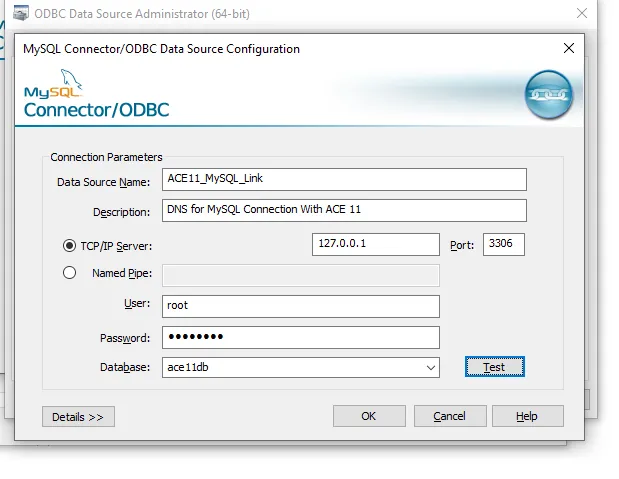
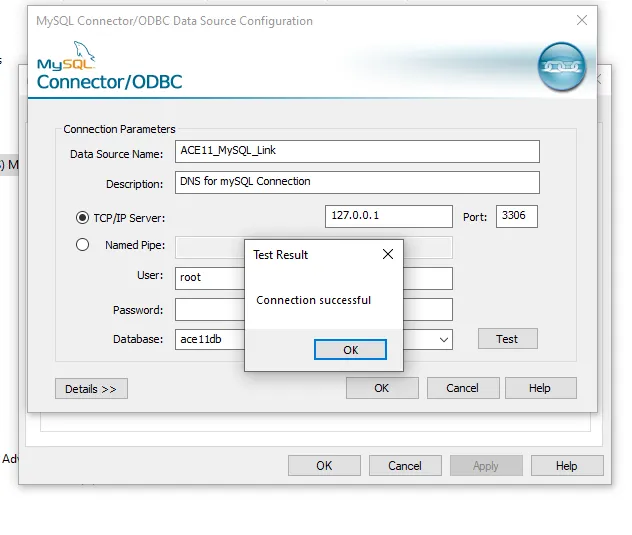
- The MySQL Connector/ODBC Data Source Configuration dialog box opens, provide information for:
- Data Source Name: ACE11_MySQL_Link
- Description: DNS for MySQL Connection With ACE 11
- TCP/IP Server: localhost or 127.0.0.1
- Port: 3306 (default MySQL port)
- User: root
- Password: [your database password]
- Database: ace11db
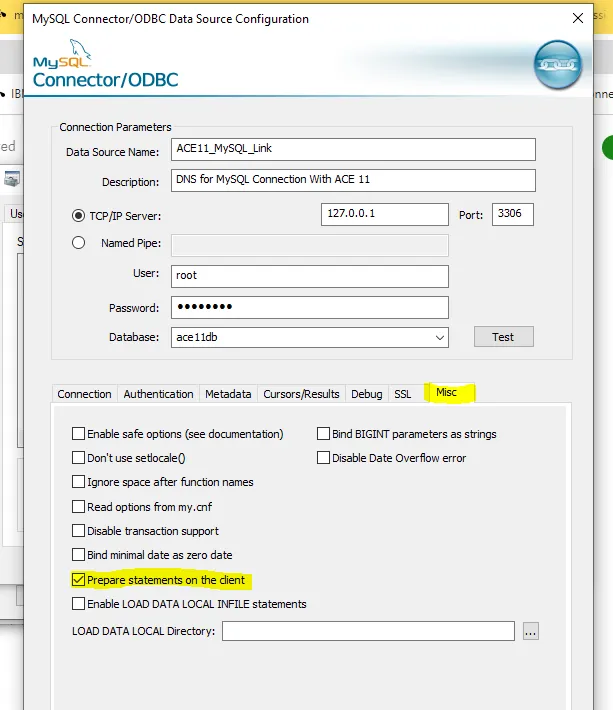
- Additional configuration:
- Click “Details >>” and navigate to the “Misc” tab
- Select the “Prepare statements on the client” checkbox
- Test your connection:
- Click “Test” to verify the connection
- Resolve any issues if the connection fails
- Save your configuration:
- Click OK to close the MySQL Connector/ODBC Data Source Configuration dialog box.
- Click “OK” to close the ODBC Data Source Administrator. System DSN has been created successfully, in next step we will be using this DSN for data retrieval and insertion in DB with IBM ACE Application.
Step 3: Configure database credentials with mqsisetdbparms in IBM ACE console
Execute the following commands in the IBM ACE console to configure the database credentials and DSN, then restart the integration node. Where -n flag is DNS name -u flag is user and -p flag is password of database.
command1: mqsisetdbparms IIBNODE -n odbc::ACE11_MySQL_Link -u root -p Password
command2: mqsistop IIBNODE
command3: mqsistart IIBNODE

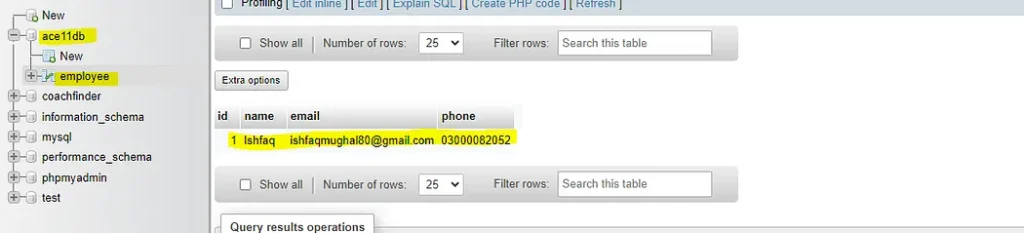
Step 4: Prepare Your Database
Create a database named ace11db with a table called employee, and insert an initial record:
CREATE DATABASE ace11db;
USE ace11db;

CREATE TABLE employee (
    id INT AUTO_INCREMENT PRIMARY KEY,
    name VARCHAR(100),
    email VARCHAR(100),
    phone VARCHAR(20)
);

INSERT INTO employee (name, email, phone) VALUES ('John Doe', 'john@example.com', '1234567890');
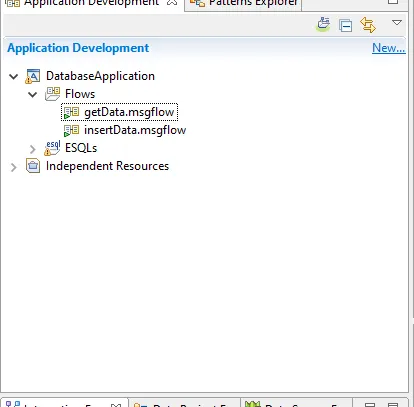
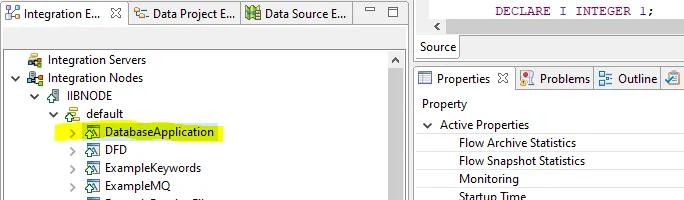
Step 5: Create an IBM ACE Application in toolkit
- Create an application named
DatabaseApplication - Add two message flows:
getData(for retrieving employee information)insertData(for adding new employees)
Implementing the getData message flow
Construct the message flow as shown in below image. Select HTTP Input node and provide path suffix for URL as /get-data and Input Message Parsing as JSON. Select the Compute Node and provide Data Source as ACE11_MySQL_Link, which was created in step 2.
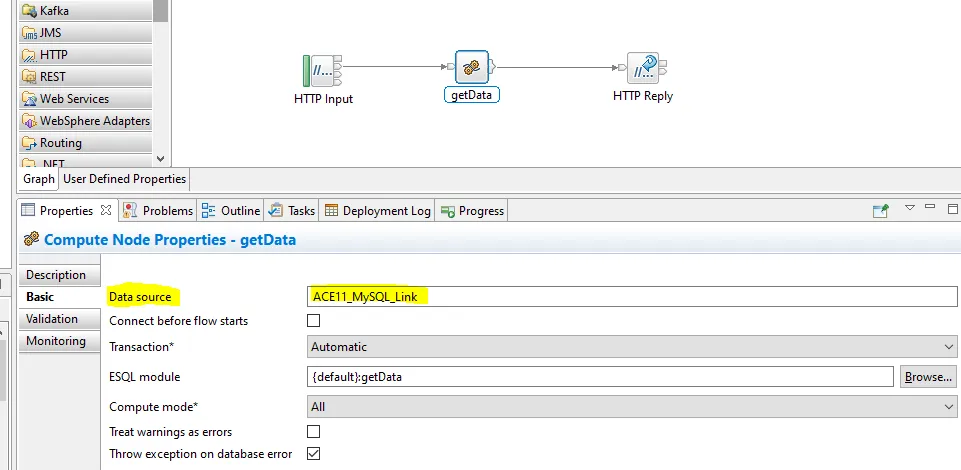
Double click on Compute Node, write the following code and save the getData message flow.
SET OutputRoot.JSON.Data.Employee[] = PASSTHRU('SELECT * FROM employee where id=?' TO Database.ACE11_MySQL_Link VALUES (InputRoot.JSON.Data.id));

IF OutputRoot.JSON.Data.Employee.id IS NULL THEN
    SET OutputRoot.JSON.Data.message='No Record Found';
    RETURN TRUE;
END IF;
Implementing the insertData message flow
Construct the flow as shown in below image. Select HTTP Input node and provide path suffix for URL as /insert-data and Input Message Parsing as JSON. Select the Compute Node and provide Data Source as ACE11_MySQL_Link, which was created in step 2.
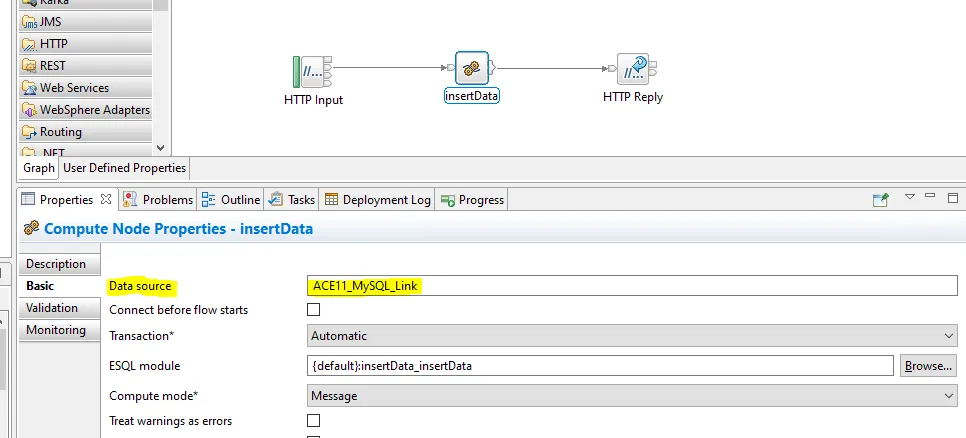
Double click on Compute Node, write the following code and save the insertData message flow.
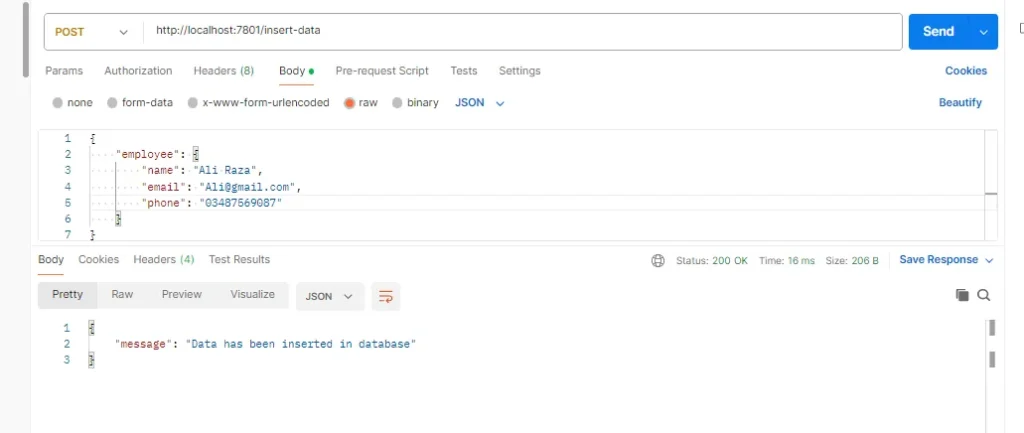
INSERT INTO Database.employee(name, email, phone) VALUES (InputRoot.JSON.Data.employee.name, InputRoot.JSON.Data.employee.email, InputRoot.JSON.Data.employee.phone);

SET OutputRoot.JSON.Data.message='Data has been inserted in database';
Deploy the application on your integration server.
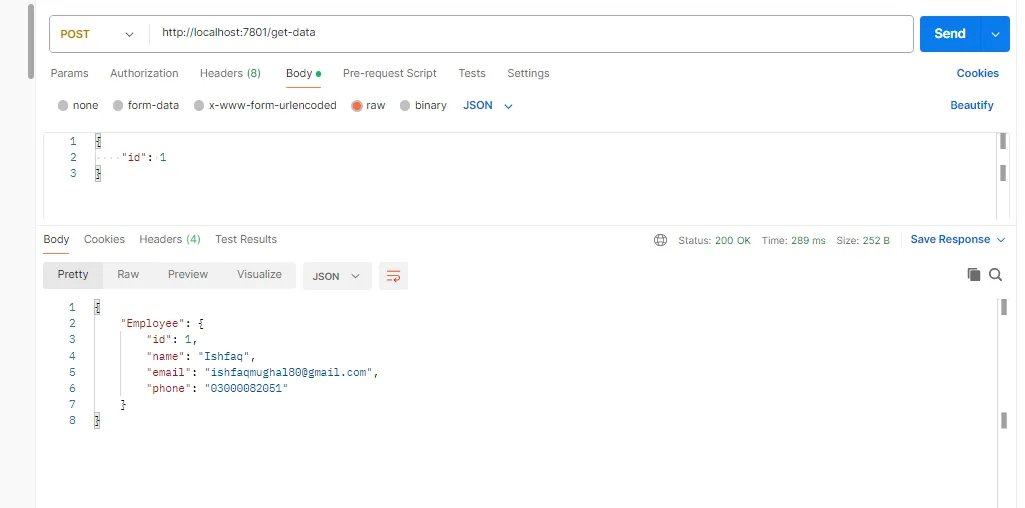
Step 6: Testing Your Application
Use Postman or any HTTP client to test your message flows:
- getData message flow:
- URL:
http://localhost:7801/get-data - Query data with id=1 to retrieve the initial record
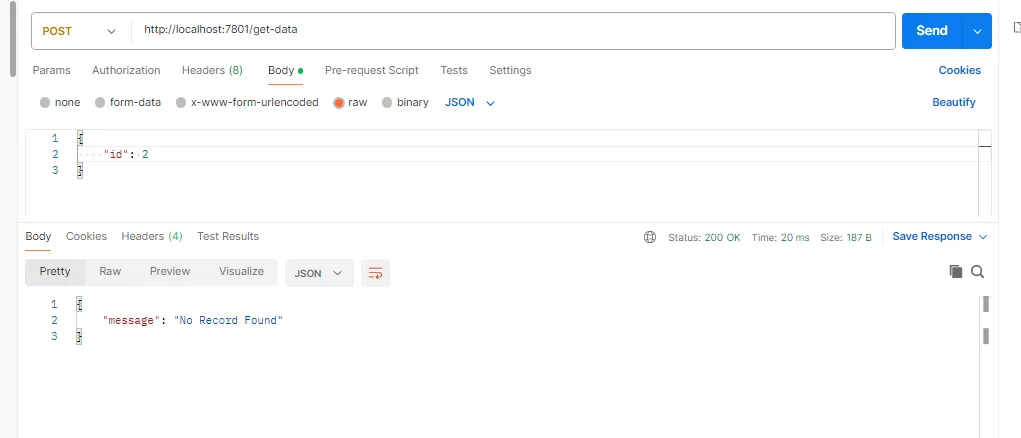
- Querying id=2 will return “No Record Found”
- URL:
Attempting to query data with id 2 will result in a ‘No Record Found’ message, as there is no data available with id 2.
- insertData message flow:
- URL:
http://localhost:7801/insert-data - Add new employee data (the id auto-increments)
- New employees will be assigned sequential IDs (next would be id=2)
- URL:
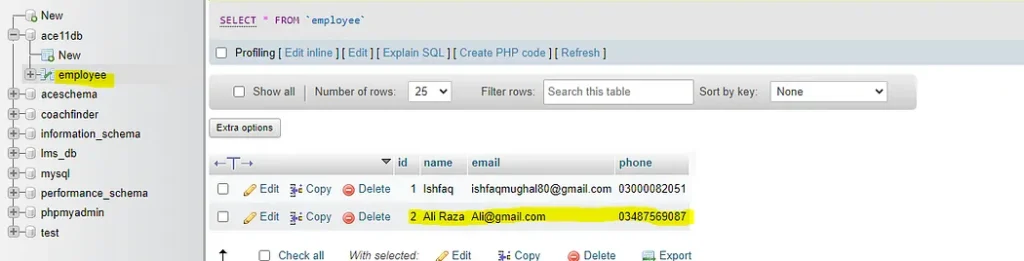
New employee’s data is available in database as can be verified in the image shown below.
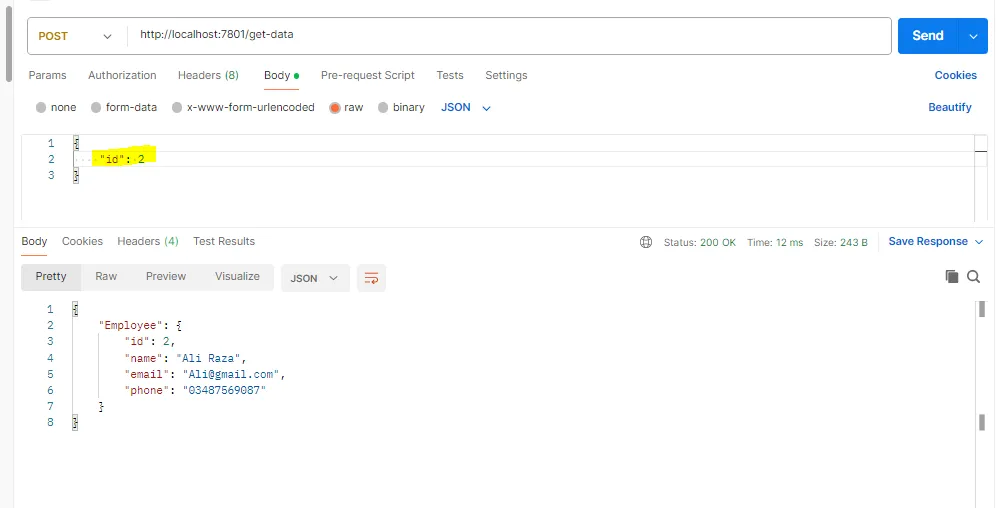
Now query the data with id 2, you will get the newly created employee details as shown below.
Conclusion
This comprehensive guide walks you through the complete process of:
- Creating a MySQL DSN on Windows
- Configuring IBM ACE application to use the ODBC connection with compute node
- Implementing data retrieval and insertion message flows
- Testing your database integration
To set up an ODBC Data Source Name (DSN) in Linux, modify the odbc.ini file and specify the required details such as the driver, hostname, port, and DSN name. This file is typically located in the installation directory of IBM ACE/IIB.
By following these steps, you’ve established a connection between IBM ACE and MySQL using ODBC, enabling seamless data operations in your integration solutions.
1 Pingback