IBM App Connect Enterprise (ACE) supports Public Key Infrastructure (PKI) configuration at multiple levels, giving you the flexibility to manage keystores and truststores based on your security needs:
- Integration Node Level: A single keystore and truststore apply to the entire integration node.
- Integration Node Listener Level: Each listener can have its own keystore and truststore. If none is configured, the node-level JKS is used.
- Integration Server Level: Each server can have its own keystore and truststore settings. If not configured, it inherits from the integration node.
- Integration Server Listener Level: Listeners can have their own keystore and truststore. If not set, they inherit from the server level. If that’s also not set, they fall back to the integration node level.
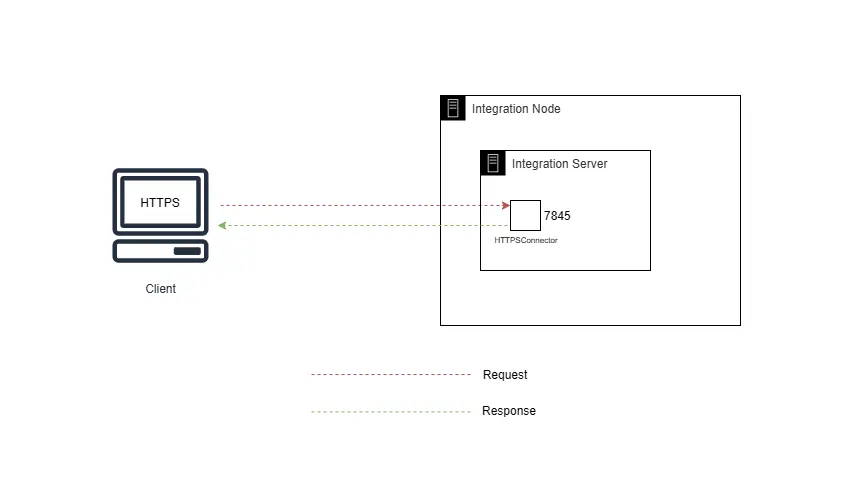
In this guide, we’ll walk through configuring Java Key Store at the Integration Server Listener Level step-by-step.
Step 1: Create a JKS and a Self-Signed Certificate
We’ll use the IBM Key Management Tool (included with IBM MQ Explorer) to create the keystore. However, you’re free to use any other tool of your choice. If you already have a keystore, feel free to skip Step 1.
- Launch the Key Management Tool.
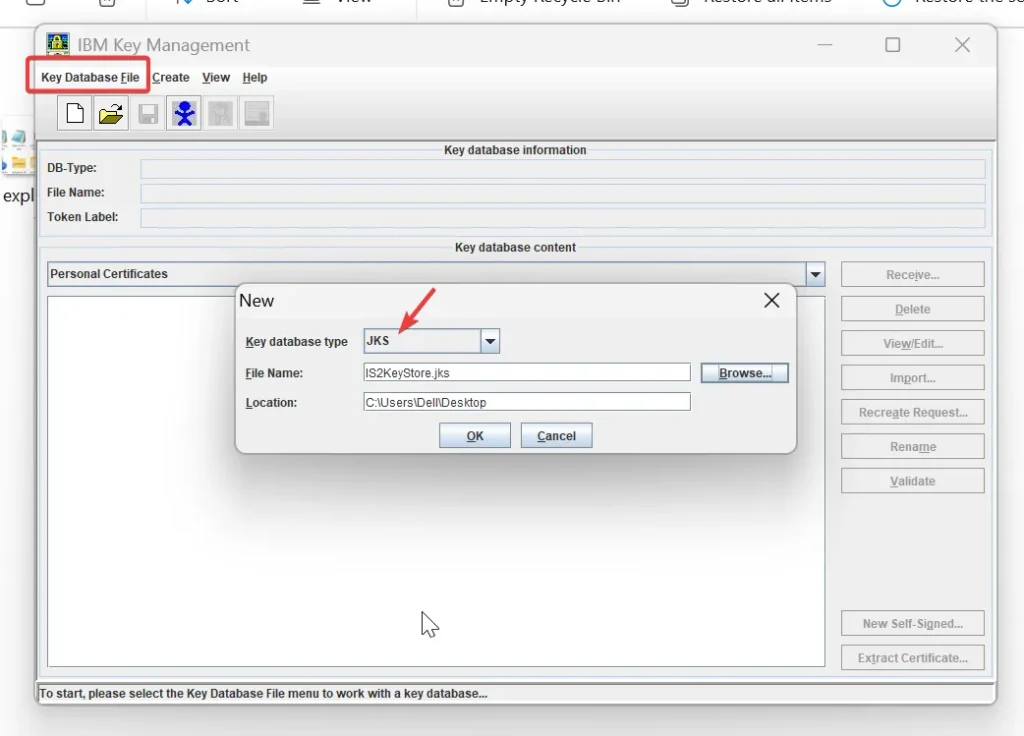
- Go to Key Database File > New.
- Choose Key database type as JKS, then enter a file name, location and click OK.
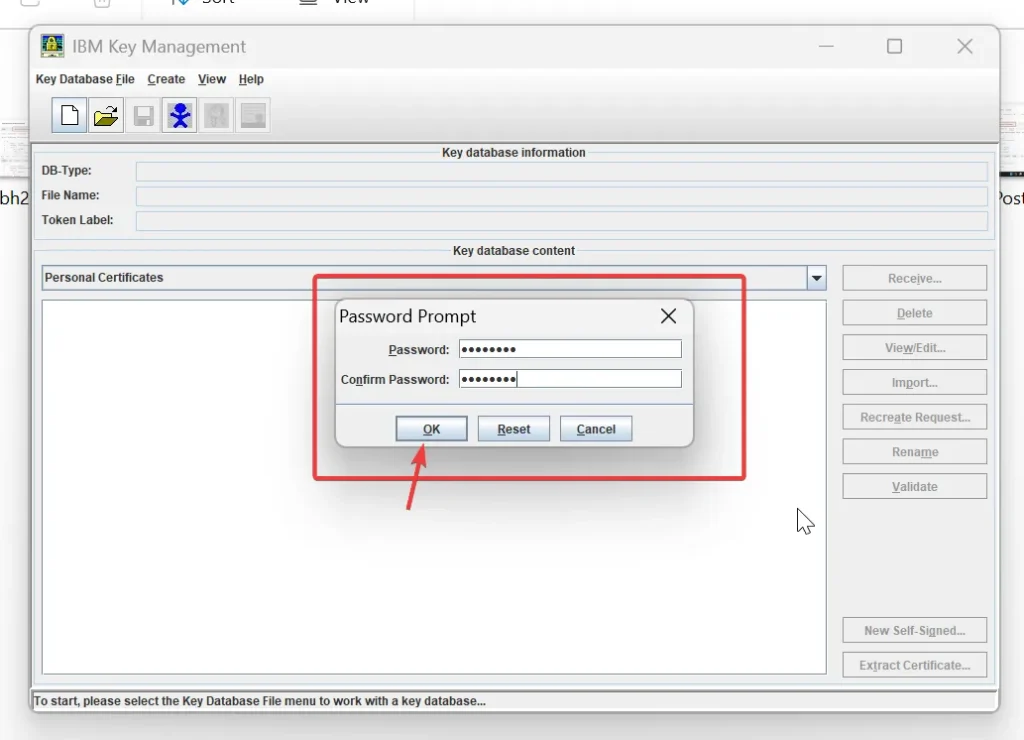
- When prompted, enter and confirm a password to secure the keystore.
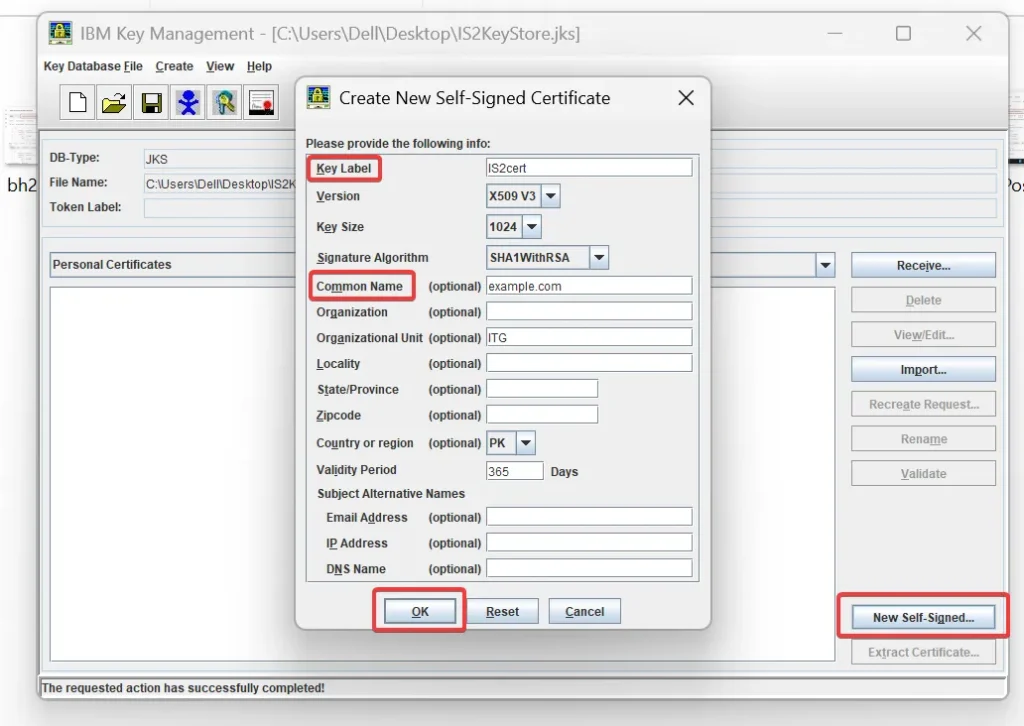
- Next, create a self-signed certificate:
- Click New Self-Signed Certificate.
- Fill in the required fields (like label, common name, etc.).
- Click OK to generate the certificate.
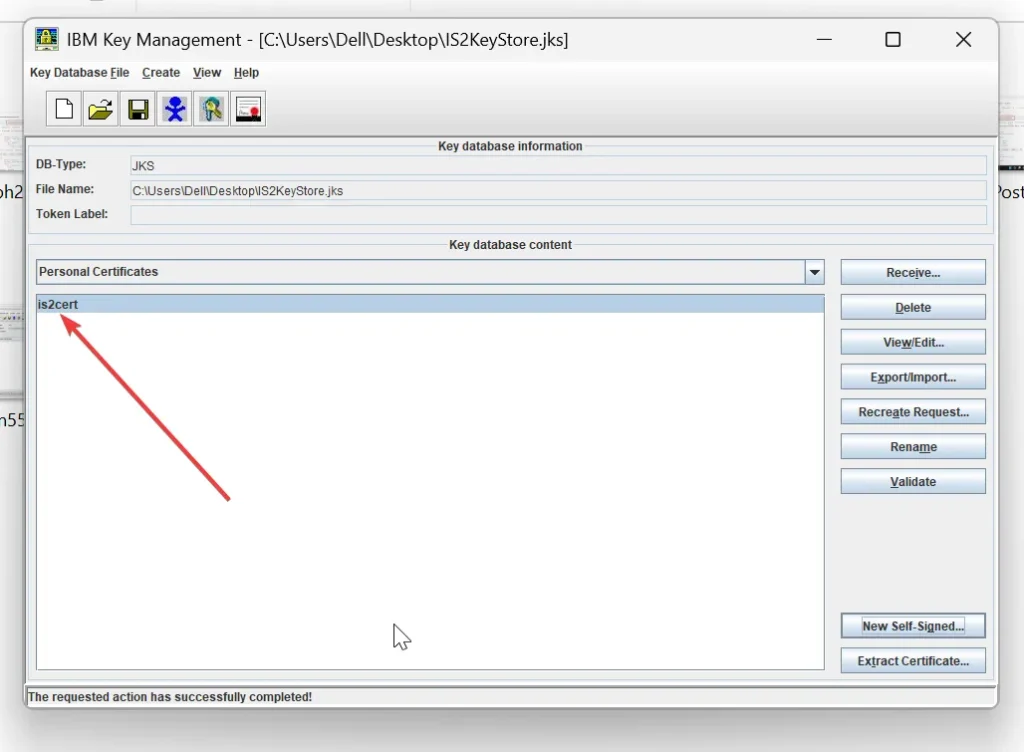
Your JKS file now contains a self-signed certificate and is ready for use.
Step 2: Configure the Integration Server to Use the JKS
Let’s assume you’ve created an integration node called ACENODE and an integration server named IS2. We’ll now configure IS2 to use the JKS:
Set the ListenerPort with following command:
mqsichangeproperties --integration-node ACENODE -e IS2 -o HTTPSConnector -n ListenerPort -v 7845
- Open the server.conf.yaml file located at: C:\ProgramData\IBM\MQSI\components\ACENODE\servers\IS2\server.conf.yaml
- Locate the HTTPSConnector section.
- Uncomment and set the following properties:
KeystoreFile: "C:/path/to/your/keystore.jks"
KeystorePassword: "your_keystore_password"
KeystoreType: "JKS"
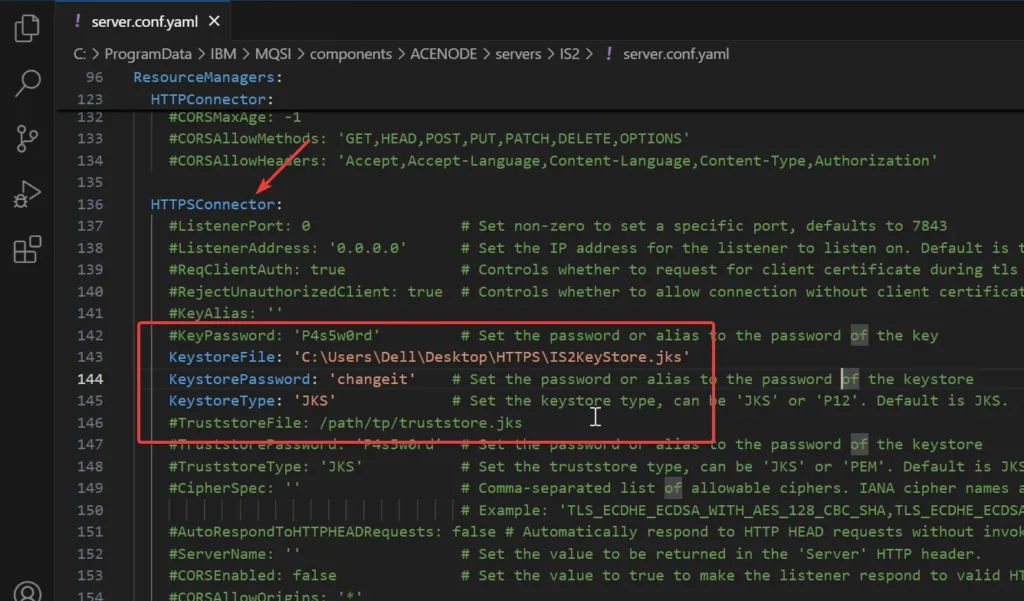
- Save the file and restart the integration server for changes to take effect.
Step 3: Testing the Configuration
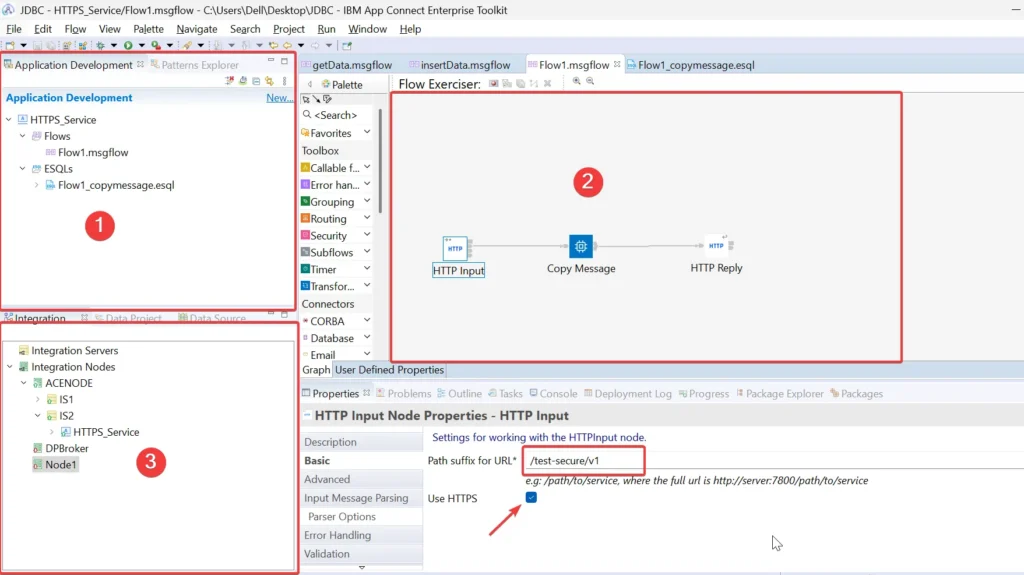
Let’s build a simple test application named HTTPS_Service with a basic loopback message flow to test the configurations:
- Create a message flow Flow1 using these nodes:
- HTTPInput:
- Set Path to /test-secure/v1
- Check the Use HTTPS
- Set input message parsing as JSON
- Compute Node:
- Double click on it and uncomment the default CopyEntireMessage() ESQL method.
- HTTPReply
- HTTPInput:
- Deploy this application to the IS2 server.
Step 4: Test with Postman
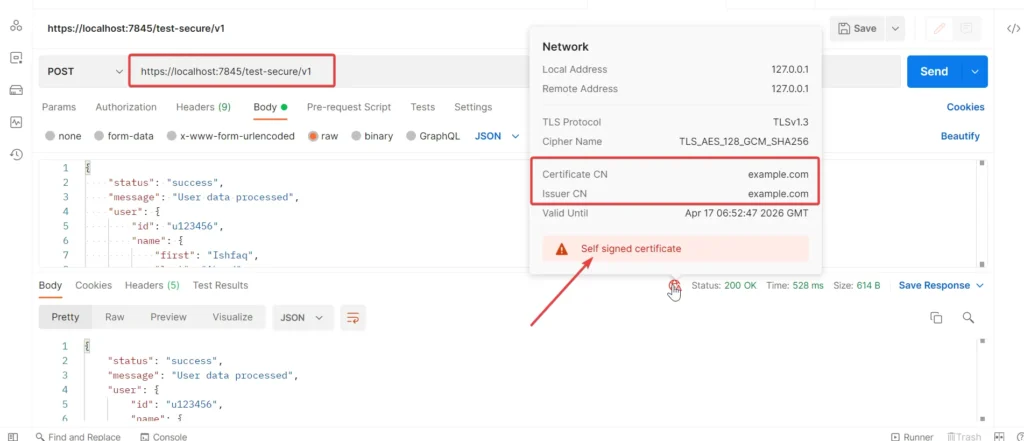
- Open Postman and make a POST request to: https://localhost:7845/test-secure/v1
- Send any valid JSON payload (e.g., { “message”: “hello” }).
- You’ll receive the same message in response.
- Postman will flag the certificate as self-signed — this is expected since we created it ourselves.
Wrapping Up
You’ve successfully configured JKS at the Integration Server Listener Level using a self-signed certificate. This setup is ideal for testing HTTPS flows securely in local or dev environments.
Leave a Reply